A belated happy new year! It has definitely gotten off to a slow start for me, but better late than never.
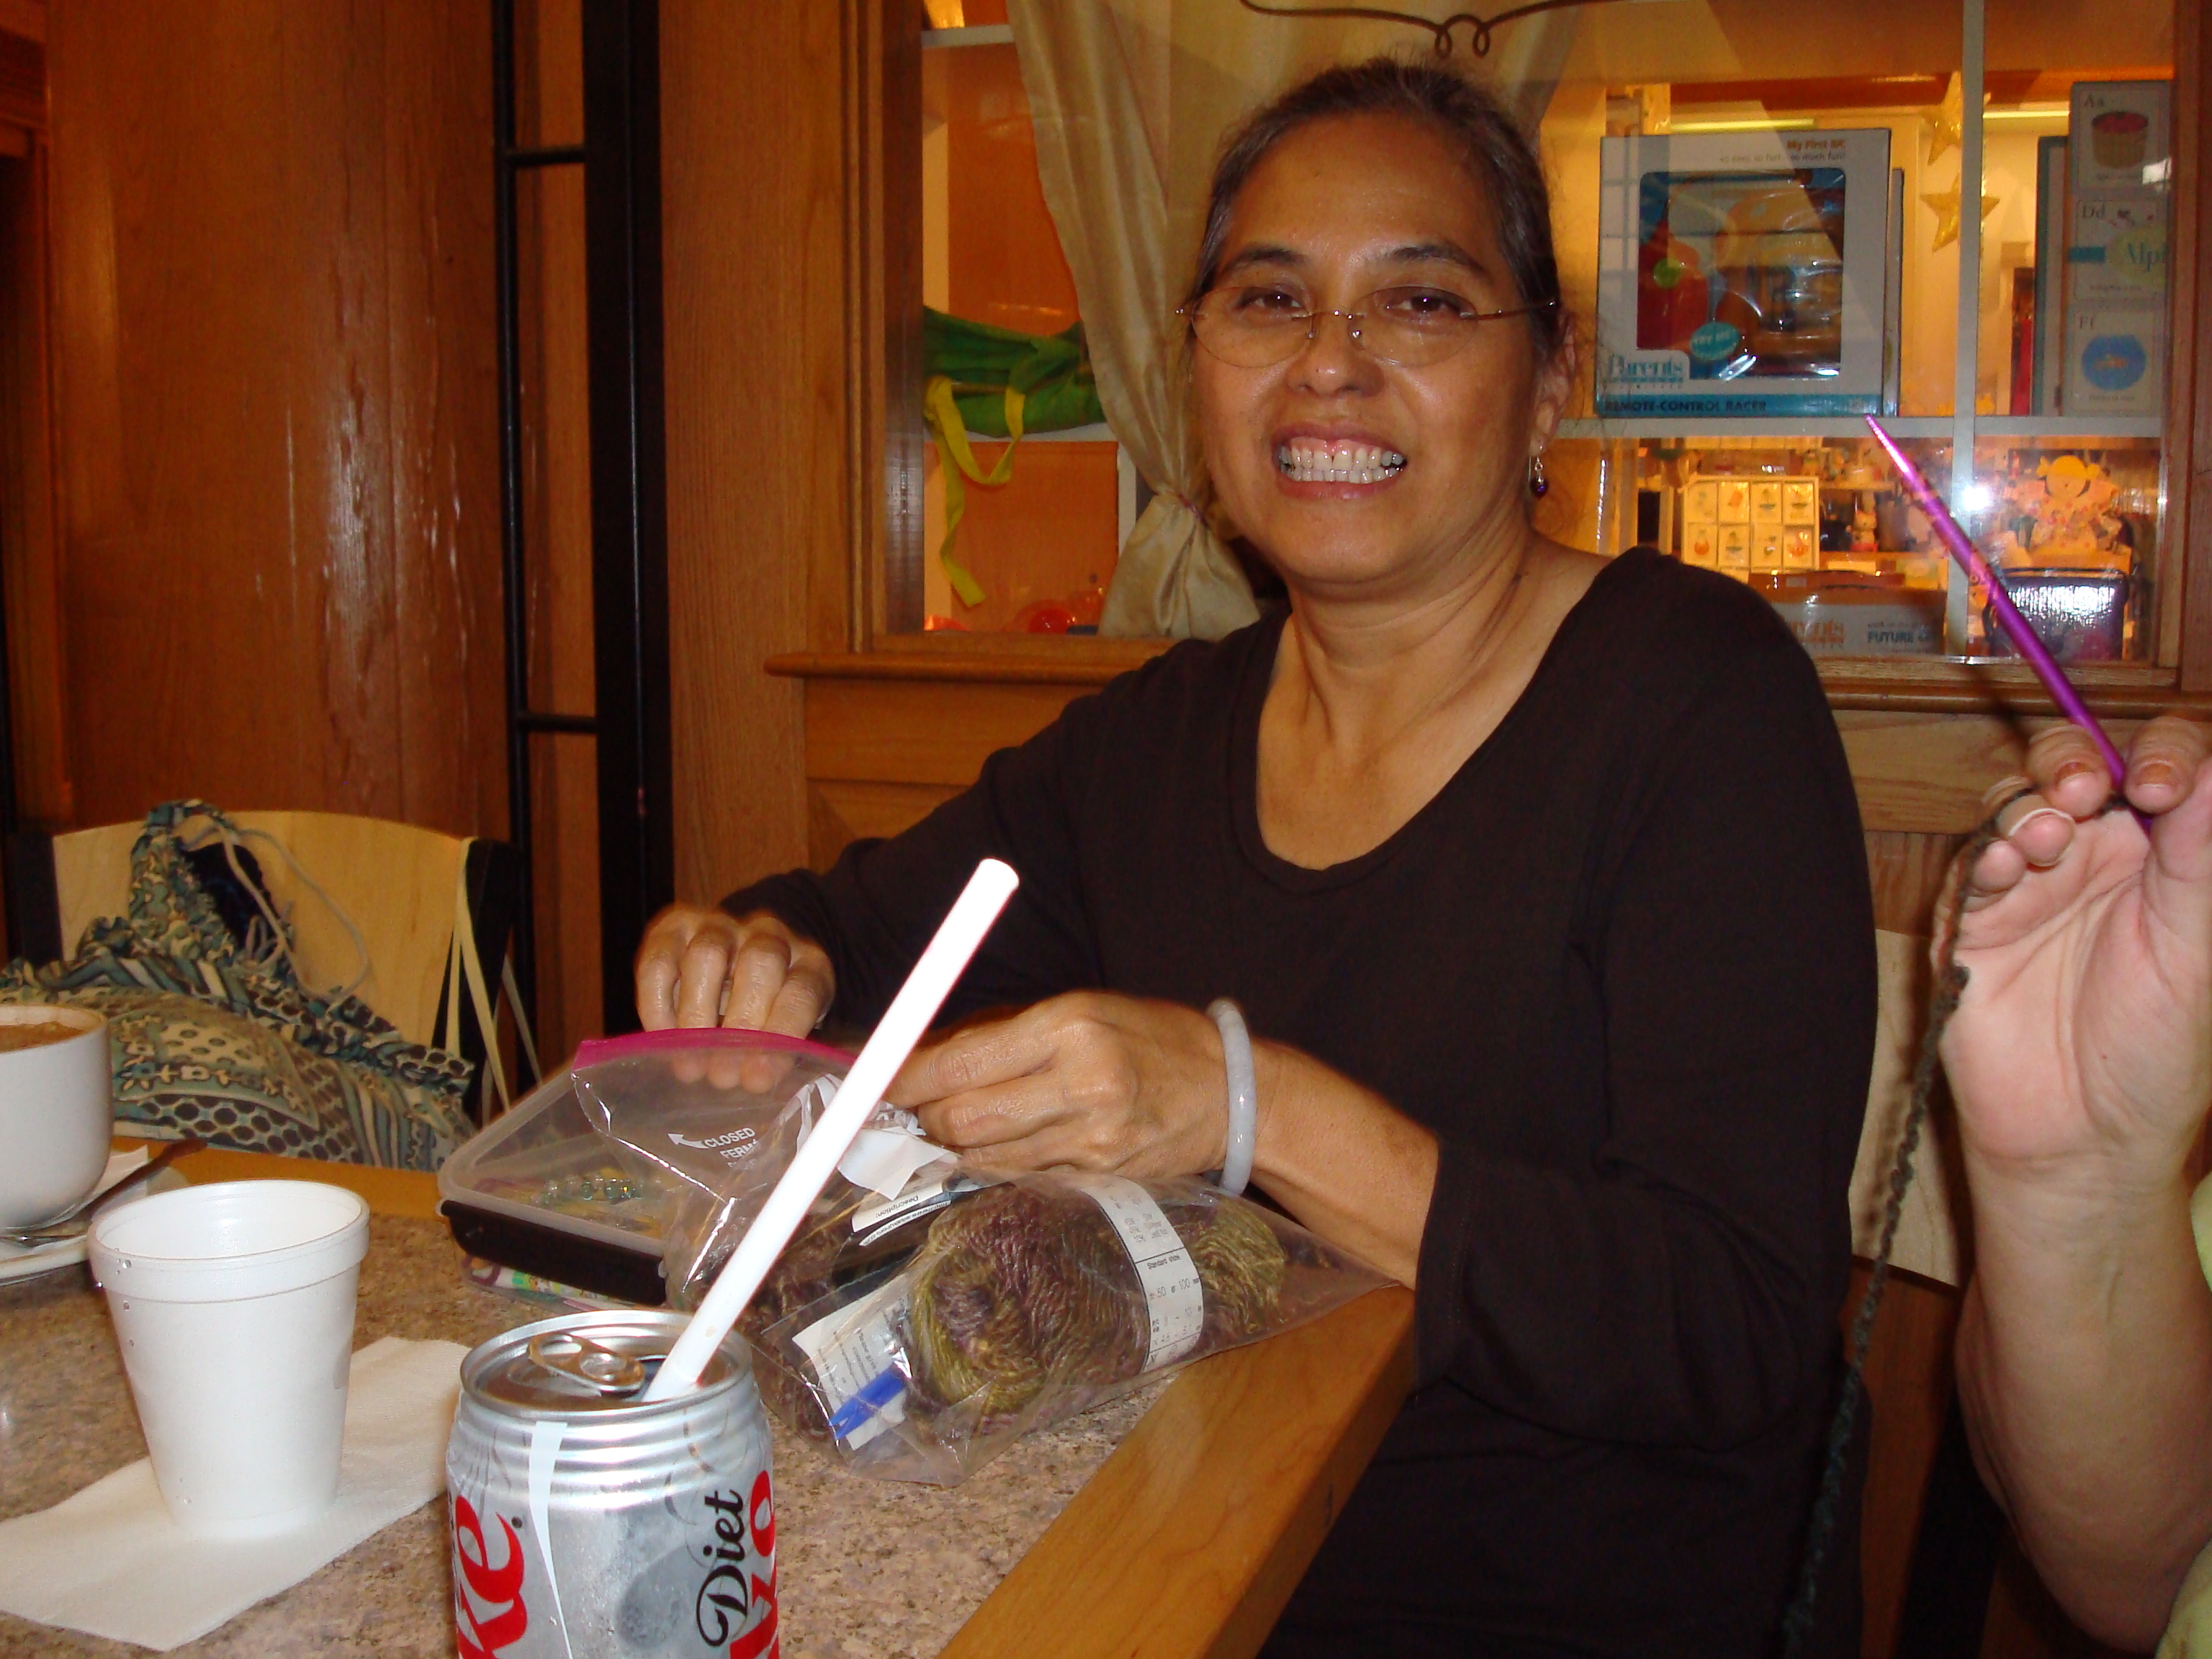
2017 is shaping up to be a great year with lots of exciting changes in store for the blog. I’ll be focusing a lot more on crochet design, and to get started, here’s a commissioned project I designed for my favorite customer, Karen.
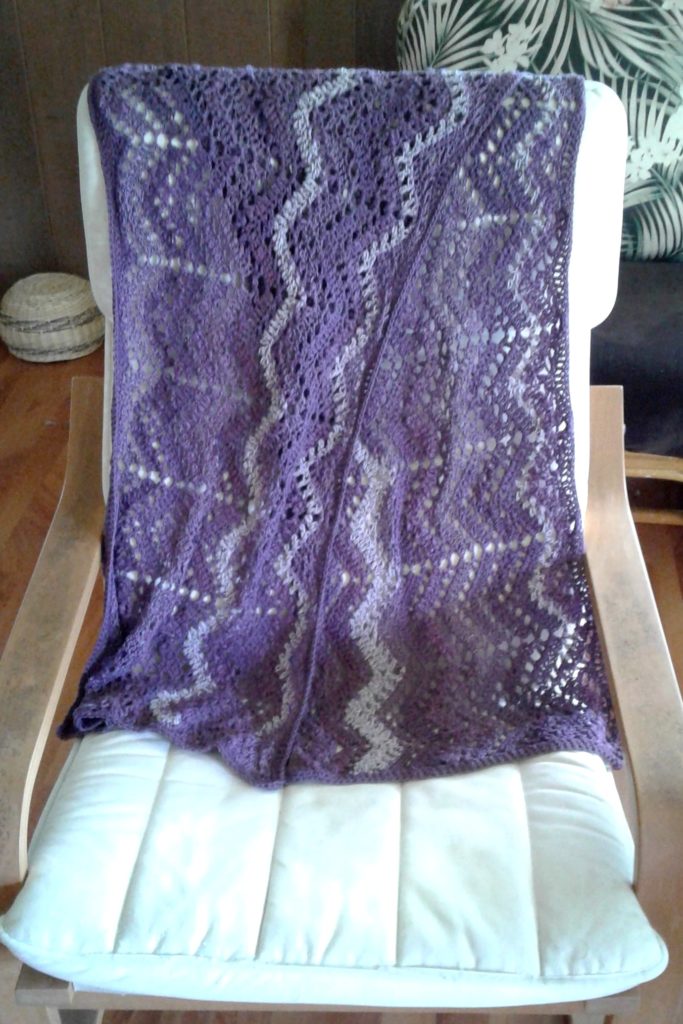
It’s a crochet wrap made with an “interesting” novelty yarn, the third commissioned project I’ve completed for Karen. The first two commissions were the Stark Cardi and the Chevron Lace wrap.
The yarn for this project had initially been intended for the Cardi project (begun by another crocheter), but it turned out not to be the best yarn for it. I suggested this yarn could be used to create a wrap or shawl. We agreed that I would start on it as soon as the Cardi and Chevron Lace Wrap were completed.
The “Interesting” Yarn
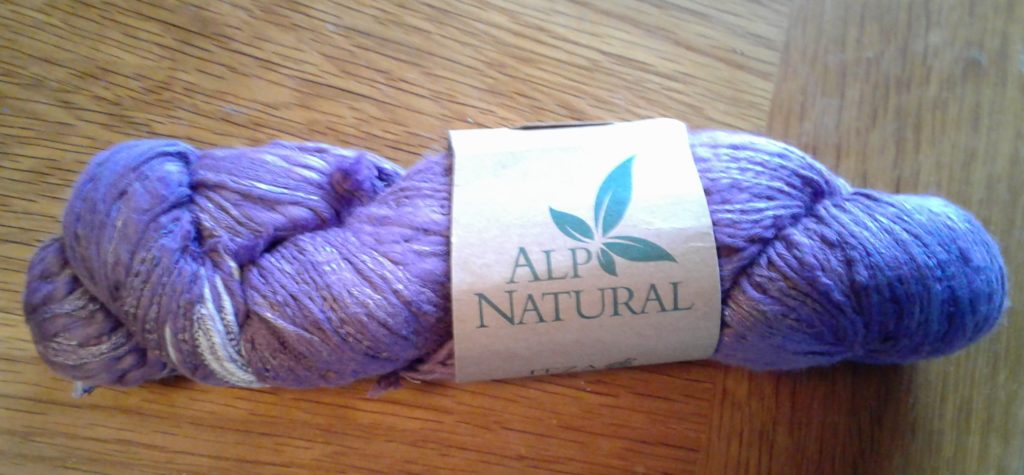
I don’t think I’ve ever crocheted with a novelty yarn that has SEVEN different types of yarn in it, from bulky-weight yarn down to fingering-weight. Needless to say, it made crocheting a bit of a challenge, but I was able to pull it off.
The yarn is Feza Alp Natural and contains 40% cotton, 40% viscose, 10% silk, and 10% linen. Each hank is 231 yards, and I used a little over 3 hanks to complete the wrap. And despite those variations in weight, the yarn label describes it as DK-weight. Unfortunately (or fortunately, depending on your perspective), the yarn has been discontinued.
Once the stitch pattern was chosen (see next section below), I decided on a J/6 mm hook. It’s big enough to accommodate the bulky-weight portion of the yarn and creates a lacy fabric with the lighter-weight sections.
The Stitch Pattern
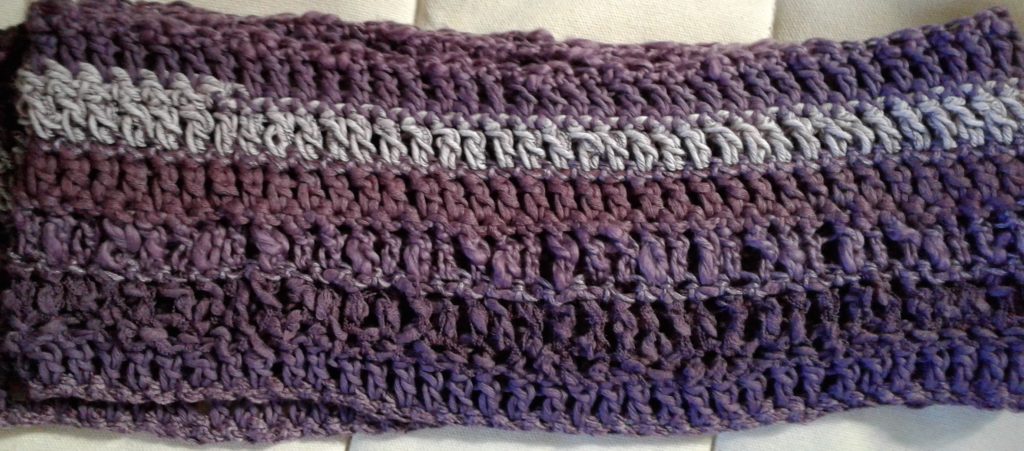
Karen and I knocked around a number of stitch patterns for this yarn. I was leaning toward a simple stitch pattern since the yarn has so many different types of fiber and effects in it (e.g., smooth, ladder, nubs, slubs, boucle, and effects I don’t even have a name for). But Karen wanted something a little fancier than boring old double crochet.
![]()
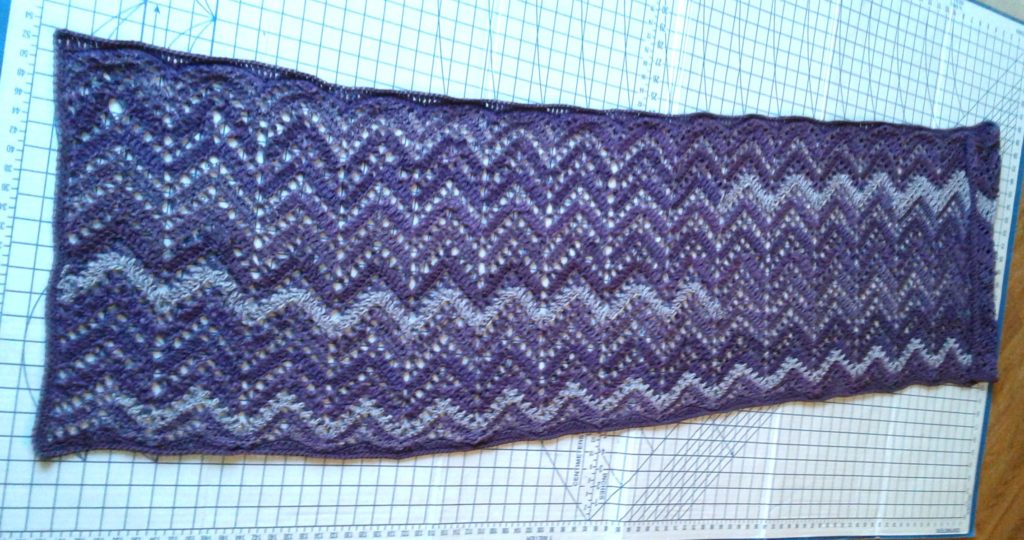
I decided to experiment with the Chevron Lace pattern in the wrap designed by Tamara Kelly (aka Moogly). Since I’d created an entire wrap with it, I’d committed the two-row repeat to memory and figured I’d be able to create it with this yarn.
The Design
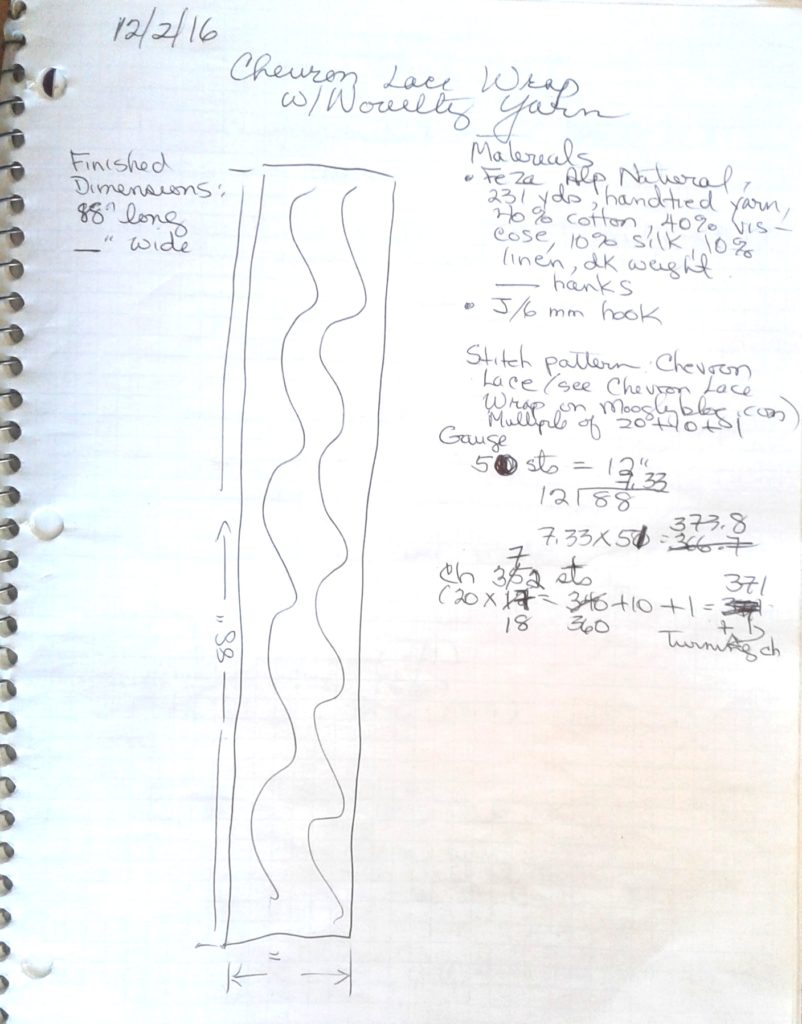
However, because of the changes in texture, I didn’t want them to appear as blocks; I wanted to create a “striping” effect. The waves would therefore have to travel across the entire length of the wrap (see diagram in my notes above). So I had some calculating to do.
Thankfully, Tamara included a symbol chart of the Chevron Lace stitch pattern which helped me figure out the stitch multiple. This is the number of stitches needed to complete one repeat of the pattern plus any additional stitches added on after the “multiples” have been added up.
For the Chevron Lace stitch, the multiple is 20 + 10 + 1. To create my foundation chain, I count by 20s (20, 40, 60 …) Once it’s as long as I need it to be, I add 10 + 1 to that number to get the final number of chains needed for the wrap.
Karen wanted this wrap to be 88″ long, so I also needed a stitch gauge (i.e, the number of stitches per inch). I measured over 50 stitches in my sample. That’s 40 (multiple of 20) + 10 + 1. The final “1” represents the turning chain which I didn’t need to determine the gauge which turned out to be 50 sts = 12″.
I next need to figure out how many times 12″ goes into 88″. And the result of that calculation is 7.33 times.
Now I can multiply 7.33 x 50 = 366.7. I did these calculations two months ago, so for some reason I made a change and multiplied by 51 instead of 50. Unfortunately, I can’t remember why I made that change, which is a good reason why your design notes should be as detailed as possible, including the reasons changes are made. In any event 7.33 x 51 = 373.8 chains.
My final calculation is to figure how to fit the multiple — 20 + 10 + 1 — into 373.8 (or 374) chains. I need to multiply 20, 18 times to get 360 stitches. Nineteen times is not enough and 20 times is too much. To that I add 10 (370) + 1 = 371. The formula looks like this:
20 x 18 = 360 +10 + 1 =371. Close enough!
To make counting easier, I placed a stitch marker every 30 chains so I didn’t have to count the entire chain. I just needed to keep counting by 30 until I got to the desired number of chains. And I always chain five or six stitches more than the number I need so that I can make adjustments at the end if my count is off.
NOTE: Now that I’m looking over these calculations again, I’m not 100% sure they are correct. That “10 + 1″ kind of messed up my gauge calculations and, as a result, the final stitch count. However, because this is a simple rectangle, close enough is good enough. The wrap’s final length was 76” but I’m pretty sure that’s because of the edging I added (explained below).
Edging the Wrap
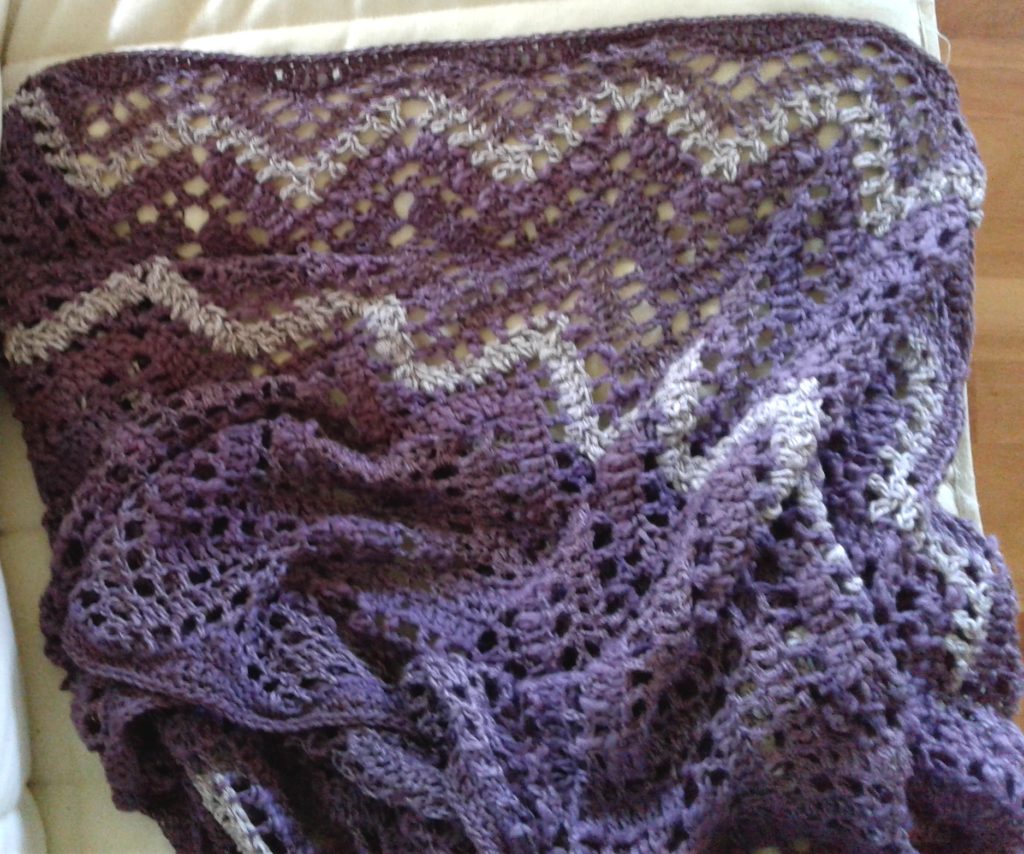
To make this wrap a true rectangle, I needed to turn the wavy edges along the top and bottom into straight edges. This meant adding stitches of varying lengths (i.e., slip stitch, single, half double, double, and treble crochet, double, half double, single slip stitch) between the peaks of the wave pattern. And I made sure I had the same number of stitches between each peak. I single crocheted the shorter edges with three stitches in each corner.
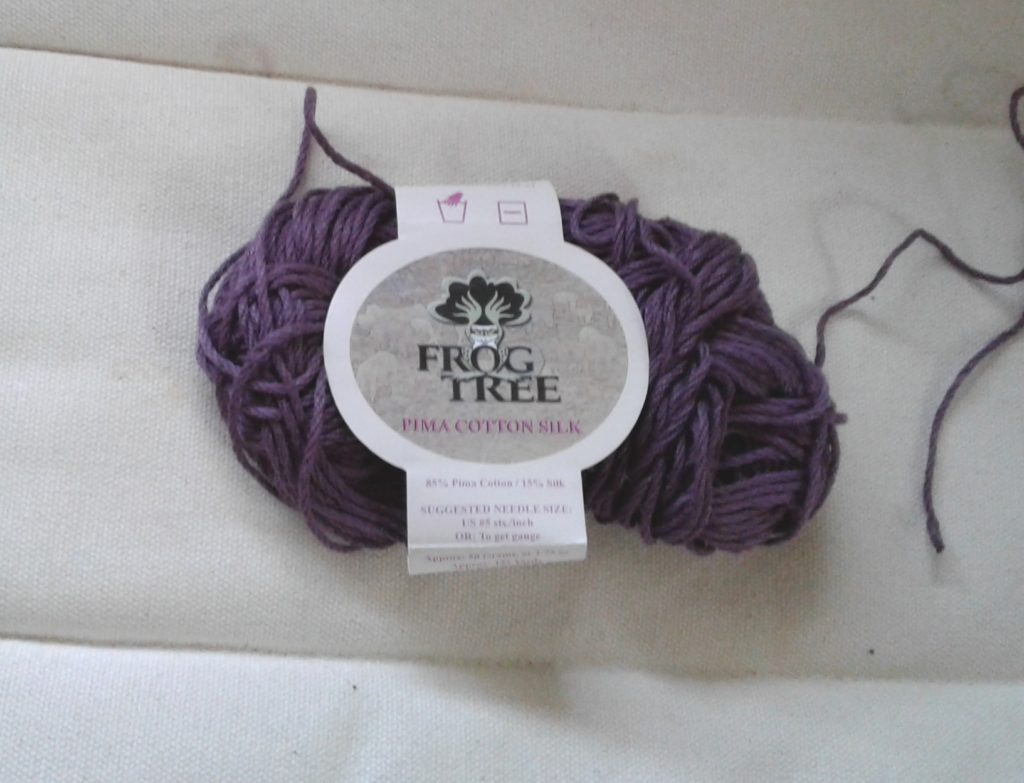
I also used an entirely different yarn to create this edging because I knew there was NO WAY I was going to get a clean, smooth edge with the novelty yarn. Karen and I found a lovely pima cotton/silk, DK-weight blend by Frog Tree that was a perfect color match (this yarn is also discontinued).
I mentioned earlier that the wrap is only 76″ long instead of the 88″ I’d planned for. I believe this is because of the length between each wave peaks. If I’d added a stitch or two more between those peaks, I might have gotten 88″. But it’s long enough for Karen, who by the way, absolutely loves it.
Rectangular Wraps Are Easy to Design
I hope I haven’t over-complicated my description to make that a false sub-heading. But it IS true because you are basically just crocheting in rows.
- Find a pretty stitch pattern – stitch dictionaries are very helpful. And there’s Pinterest, too.
- Match it with yarn and hook size to create the fabric you want. This means creating fairly large (at least 8″ x 8″) swatches until you’re satisfied with the look and drape of the fabric.
- Purchase between 600 and 900 yards, depending on the size of your wrap.
- Determine gauge, and use it with the pattern’s stitch multiple to figure out how many chains you need for your foundation chain. OR you can simply crochet an extra-long foundation chain, then crochet your first row to the desired length.
- Continue crocheting until the wrap is the desired width, between 16″ and 20′.
With just a few simple steps, you’ll be designing beautiful crochet wraps of your own. Please let me know if you have questions in the comment section below.