This post contains affiliate links. Read my Disclosure Policy for more information. Thanks for your support!
Part of my quest to clean up my diet is to let go of wheat-based products. But carb-lover that I am, finding a gluten- and GMO-free bread has been challenging … until now!
I have to thank my friend Julia Myers for introducing me to these scrumptious biscuits. She brought a batch to our Memorial-Day-weekend, potluck barbeque, and I couldn’t stop eating them! Come to find out, this mouth-watering bread is made with tapioca flour, which comes from the cassava plant and is used a lot in Asian dishes (bubble tea fanatics know what I’m talking about).
Tapioca flour results in a bread that’s light and easy to digest. For this recipe, I used Bob’s Red Mill Tapioca Flour .
Learning Curve
I haven’t baked in a long time, so it took two tries to perfect the recipe. The Pao de Queijo recipe Julia based her cheesy biscuits on can be found HERE . We both made some changes to the recipe; mine were based on the ingredients I had on hand.
Instead of the ½ cup of olive oil, Julia used ¼ cup of unsalted butter. The first time I made them, I used coconut oil, the only oil I use for cooking.
I also added Italian seasoning, thinking it would be a great (i.e. easy) way to add flavor to the biscuits without a lot of fuss. But I probably added too much because when the bread started baking, the smell was pretty overwhelming.
I also probably added a little more than 2 cups of tapioca flour because I kept shaking the measuring cup so the flour would settle and give me a better view of where it came in the measuring cup. I wanted to make sure I had EXACTLY 2 cups.
While I was bending over to get a clear view of the measuring scale on the side of the cup, I had a flashback to high school, doing the same thing and my home economics teacher coming up behind me and swatting me on the butt, saying I should know better than to do that (yeah, teachers did that kind of stuff back in the sixties).
I should have heeded the message (still working on following and not ignoring intuitive guidance) because when I started mixing the water/milk/oil into the flour, the liquid got absorbed almost immediately, and I had all this flour remaining to be mixed in.
I couldn’t imagine how the liquid would be enough. So I heated up a little more water/milk/oil in the microwave and added it to the flour, forgetting I still had 2 beaten eggs to add. Once the eggs were added, the mixture was kind of runny, and the biscuits came out flat as pancakes.
Finally, I used shredded Parmesan cheese instead of grated cheese, which I think made the biscuits heavier than they’re supposed to be. But they were edible, and I figured I would adjust the recipe next time I made them.
Ah, Perfection!
This time, I –
- Used ¼ cup of butter instead of olive or coconut oil,
- Substituted garlic salt for the Italian seasoning, and
- Added grated instead of shredded Parmesan cheese.
Using butter instead of oil and grated instead of shredded cheese increased the biscuits’ light texture; the garlic salt added a subtle yet distinct flavor that doesn’t overwhelm the senses. And because the butter was salted and I used garlic salt as seasoning, I didn’t add the salt the recipe calls for.
Along with the 1/3 cup of water, I used 1/3 cup of goat’s milk both times instead of cow’s or soy milk. Yes, it’s a lot more expensive, but I rarely purchase milk and don’t eat soy for a number of health reasons. Goat’s milk, on the other hand, is so much more tasty than cow’s or soy milk, not to mention easier to digest. It’s definitely worth the extra expense, IMHO.
Finally, I did not shake the measuring cup to settle the flour, just poured it from the bag to the cup until it reached the 2-cup mark.
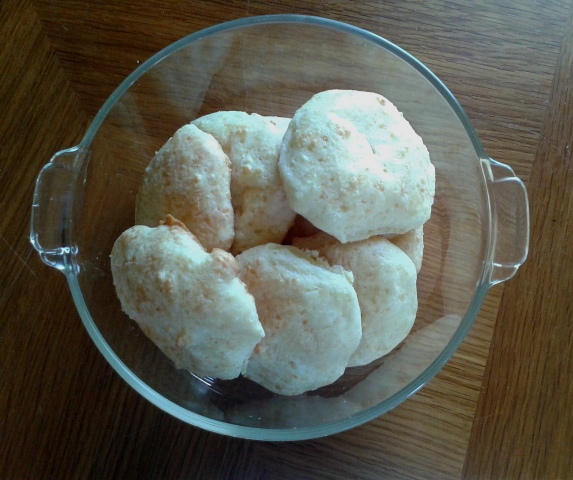
As you can see from the photo above, the biscuits are still a little flat, but they’re a lot puffier than the first batch and oh so delicious. My daughter suggested using a cupcake pan instead of a cookie sheet the first time I made them. I think I’ll take her advice next time around.
Needless to say, I’ll be making Pao de Queijo on a regular basis.